
With the 2022 Release Wave 1 for Dynamics 365, we are getting an update to Advanced Find. This is currently available for Public Preview, and General Availability is expected (as of today) in April 2022.
At first glance, I was not at all thrilled with this change. However, as I dug in deeper, I started to appreciate it more and more, so let’s jump in and see what we have coming!
Turn on Modern Advanced Find
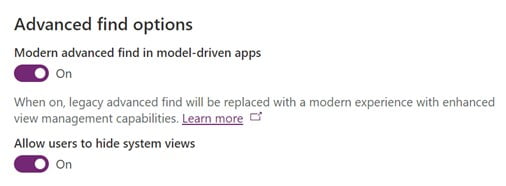
First, this needs to be enabled by a System Admin or App Maker in your environment. This is done in the Power Platform Admin Center -> select environment -> select Settings -> expand Product then select Features. Here you will find “Advanced find options” and you can switch “Modern advanced find in model-driven apps” to On.
While we’re here, just below the setting for Modern advanced find, there’s an option to “Allow users to hide system views” that can also be turned On. This is exactly what it sounds like – it allows users to hide system views from their view selector/drop-down:
Getting to Modern Advanced Find
Once these settings have been turned on (and Dataverse search is turned on), navigate to your Model-Driven app and you will notice the Advanced Find funnel icon is no longer available in the header (box 1).
If you have Dataverse search turned off, and you turn on Modern Advanced Find, the traditional way of accessing Advanced Find (funnel in the header) is still there, but it will take you to the Modern Advanced Find experience.
Instead, you will click into the Dataverse Search in the header (box 2) and at the bottom of the pop out select “Search for rows in a table using advanced filters”:

This will open a fly out on the side, listing the tables you can select. The tables available to select are the tables included in the Model-Driven app you are working from. Here, I am working from the Customer Service Hub and since we do not have Opportunities included in the Customer Service Hub Model-Driven app, I’m not able to select Opportunities:
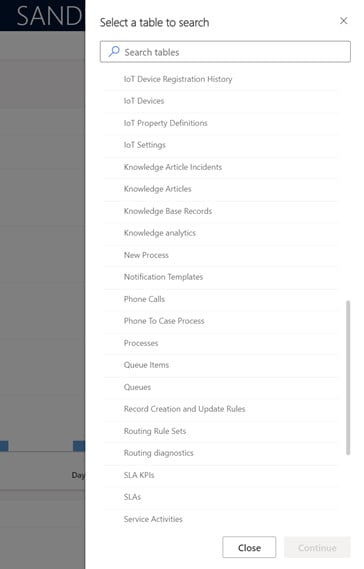
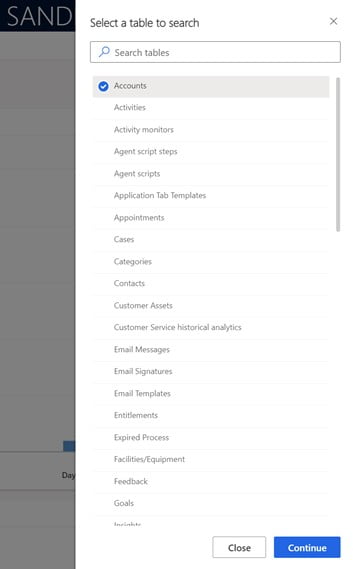
Select the table you want to search, then click Continue at the bottom.
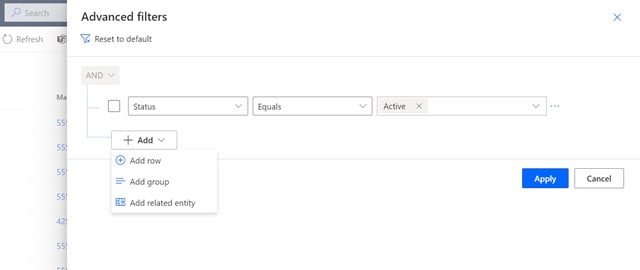
The UI will automatically navigate to the table selected, and open another fly out titled “Advanced filters”, with your default view on that table being the default filters loaded. My default view for Accounts is set to “Active Accounts”. My interface switched to the Account table, and the filter applied is Status equals Active.
+Add is how you will add additional filters to your selected table. Your options under +Add are “Add row”, “Add group”, and “Add related entity”:
Filters and Grouping
Add row – this will allow you to choose a column from the selected table to filter on. Since I’m looking at Accounts, a common scenario might be to select the Address 1: City field to filter Accounts in a specific city. The operators we are used to are still available – Equals, Contains, Ends with…
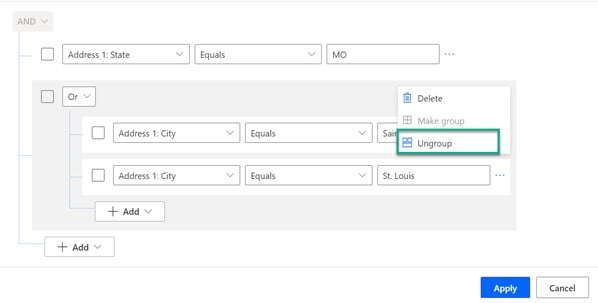
Add group – this is how you will get the “And” “Or” conditions. An additional +Add becomes available within the group when this is selected, allowing you to add additional rows or groups. You can ungroup rows by clicking the ellipsis (three dots) to the right of the grouping, then select “Ungroup”:
If you’ve added rows not in groupings, you can select the rows you want to group, click the ellipsis to the right, then select “Make group”:
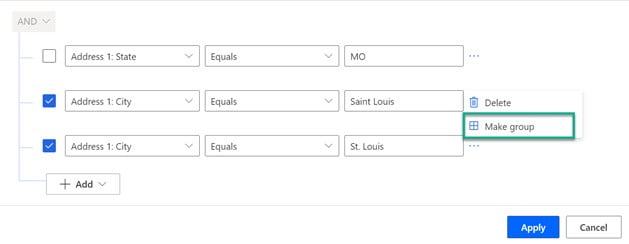
As of today, the Make Group function does not seem to be working, but I suspect this will be fixed shortly, prior to General Availability.
Possible bonus – I found if you highlight the detail/value of a row/cell, you can click/drag it to a desired row. So, if you have conditions in individual rows that you really want in a group, you can click/drag it to the right place:
Add Related Entity
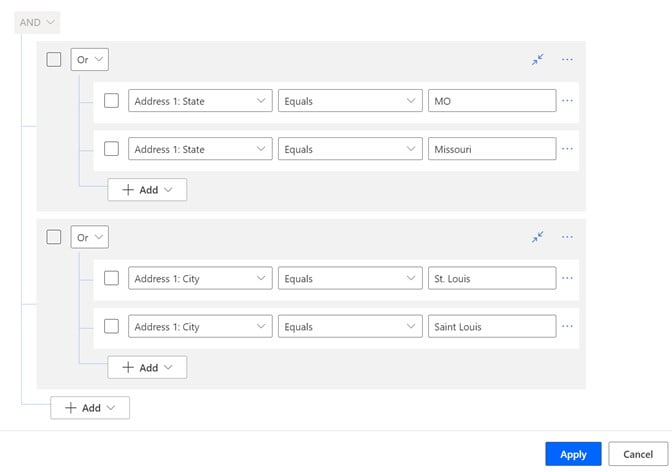
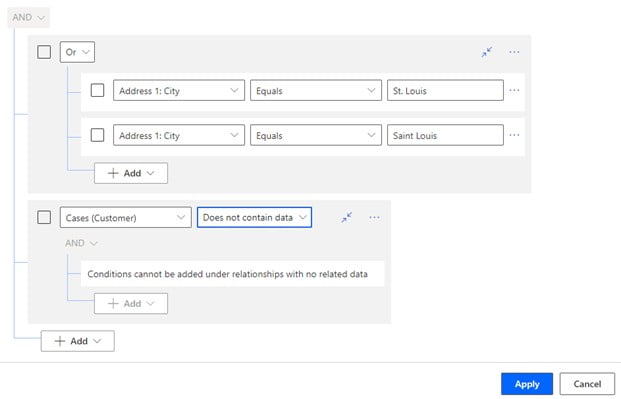
You can add conditions regarding a related entity (table), including tables that are not included in the Model-Driven app. My capture below shows the same conditions above, with the related table Cases. By default, it will be where the related table has data, and a row is provided automatically to search on that table. You can change the related table condition to “Does not contain data” to find records that do not have any of those related table records. My capture is set up to find Accounts with their City in St. Louis or Saint Louis and have had no Cases.
Working With Views
After applying all my filters, I saved my view from the view list drop down. Once saved, my view is visible in the drop-down list and is marked with a person icon meaning it’s a personal view ![]() . I also made changes to my filters after saving (removed related table condition) so we can see all our options. Also, if you happen to have a lot of views, you can search your views! I typed in “St” and it immediately filtered down to my personal view.
. I also made changes to my filters after saving (removed related table condition) so we can see all our options. Also, if you happen to have a lot of views, you can search your views! I typed in “St” and it immediately filtered down to my personal view.
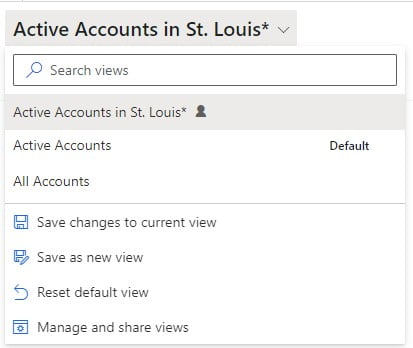
After editing my filters, I can Save changes to current view directly from the drop down. I can also Save as new view if I want to keep both versions. I can Reset default view which will put my default view back to the system default view.
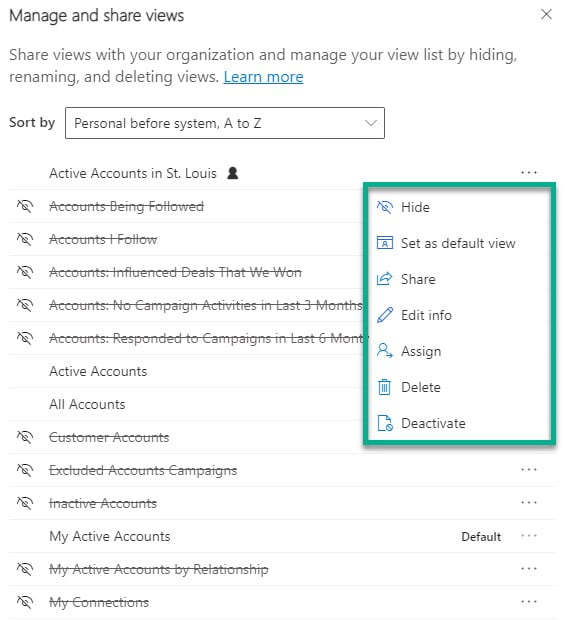
Clicking the ellipsis to the right of any personal view will show the menu in green. The only options available on System views are “Hide” and “Set as default view”. My hidden views have the strike-through the view name with the slash through the eye to the left.
-
- Both Personal and System views can be hidden by each user.
- Set as default view sets the selected view as your default.
- Share view is how you can share with another user.
- Edit info allows you to edit the Name of the view and Description of the view.
- Assign lets you choose a user to assign to the view, removing it from your list.
- Delete will delete the selected view (you will be asked to confirm).
- Deactivate will deactivate the selected view – this appears to function just like Hide view. The view is hidden from selection, and you have the option to Activate to make it reappear.
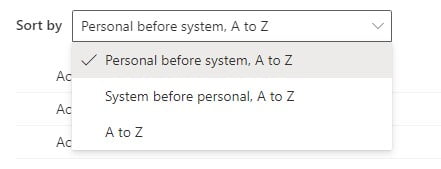
At the top of Manage and Share views, users have a drop down to choose how their views are sorted:
-
- Personal views can be listed before System views, then sorted A to Z.
- System views listed before your Personal views, then sorted A to Z.
- All views mixed, sorted A to Z, and don’t forget Personal views will be obvious with the
 icon.
icon.
This concludes the ins and outs of the Modern Advanced Find (as of writing this!). I do not see a way to get FetchXML yet, but hopefully that is coming soon.
If the Modern Advanced Find isn’t working for you, or you just want to use the classic Advanced Find, you can still go to Advanced Settings and open classic from there.
If you’re looking for the jump bar (alpha numeric selection) at the bottom of your views, head over to Pamela’s blog to find out where it went!
For more information please contact Margaret Mundt at MMundt@mailctp.com